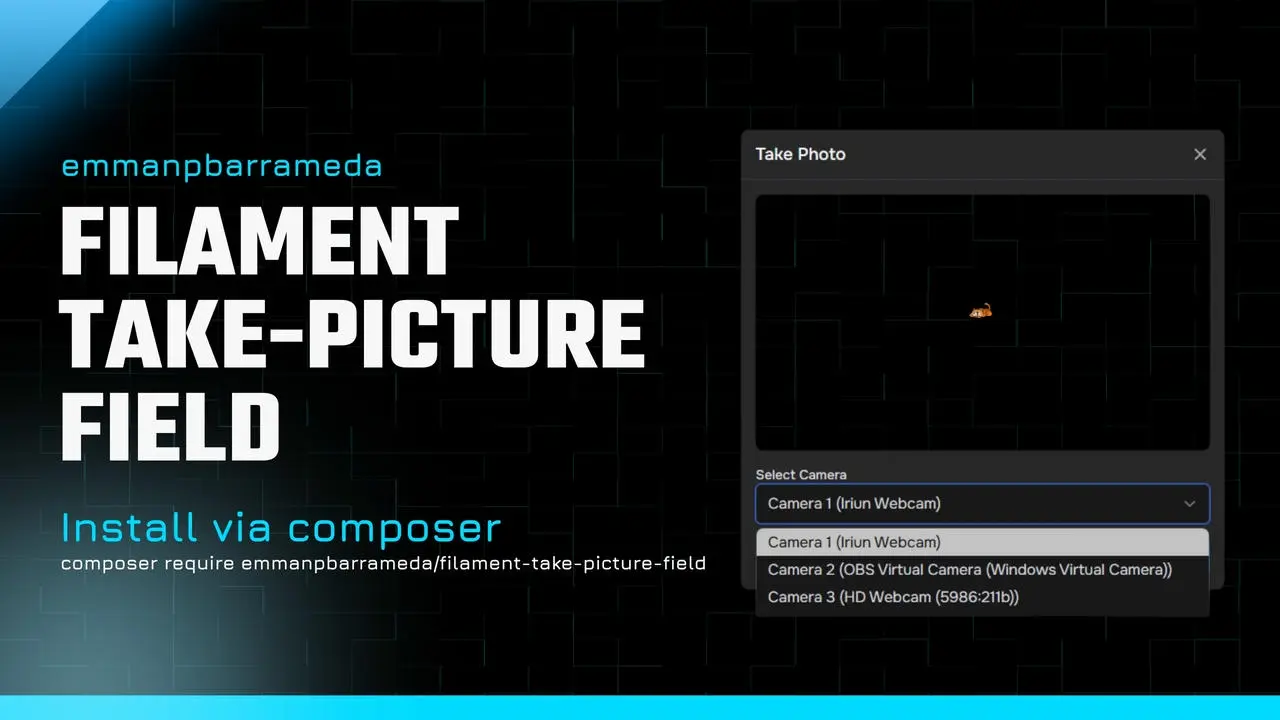
Filament Take Picture Field v1.3⎘
A custom Filament form component to capture photos from your device camera.⎘
Features⎘
- Capture photos directly from the user’s device camera
- Seamless integration with Filament forms
- Configurable storage options: disk, directory, and visibility
- Camera selector support for devices with multiple cameras
- Adjustable aspect ratio, image quality, and maximum capture dimensions
- Multiple-shot mode with custom shot keys and labels
- Option to require all configured shots before saving
- Text-to-speech instructions for multiple-shot capture
- Support for previewing, retaking, and removing captured photos
Requirements⎘
- Laravel: ^10, ^11, ^12, or ^13
- PHP: ^8.1, ^8.2, or ^8.3
- Filament Forms: ^4.0 or ^5.0
- A device with camera access (desktop or mobile)
Installation⎘
composer require emmanpbarrameda/filament-take-picture-field:^1.3Filament Theme Setup⎘
If you are using a custom Filament theme, add the package Blade views to your theme CSS file so Tailwind can scan the component classes.
In your Filament custom theme CSS file, add:
@source '../../../../vendor/emmanpbarrameda/filament-take-picture-field/resources/views/**/*.blade.php';Usage⎘
Add the component to your Filament form:
use emmanpbarrameda\FilamentTakePictureField\Forms\Components\TakePicture;
TakePicture::make('pictures')    ->label('Pictures')    ->disk('public')    ->directory('uploads/services/pictures')    ->visibility('public')
    ->aspect('16:9')    ->captureMaxDimensions(1280, 720)    ->imageQuality(50)    ->showCameraSelector(true)
    // Multiple shots configuration    ->multiple([        ['key' => 'main', 'label' => 'Main Picture'],        ['key' => 'front', 'label' => 'Front Picture'],        ['key' => 'left', 'label' => 'Left Side Picture'],        ['key' => 'right', 'label' => 'Right Side Picture'],        ['key' => 'back', 'label' => 'Back Picture'],    ])    ->requireAllShots(true)
    // Enable TTS on multiple shots    ->enableTextToSpeech(true, 'en-US')
    ->columnSpanFull()    ->required(),
Configuration Options⎘
| Method | Description |
|---|---|
label(string $label) | Set the field label displayed in the Filament form. |
disk(string $disk) | Set the storage disk for saving photos. Example: public |
directory(?string $directory) | Set the directory path within the disk where photos will be stored. Example: uploads/services/payment_receipts_proof |
visibility(string $visibility) | Set the file visibility, such as public or private. |
aspect(string $ratio) | Set the capture aspect ratio, such as 16:9, 4:3, or 1:1. |
captureMaxDimensions(?int $width, ?int $height) | Set the maximum captured image width and height. Example: 1280, 720 |
imageQuality(int $quality) | Set the JPEG image quality from 1 to 100. Example: 50 |
showCameraSelector(bool $show = true) | Show or hide the camera selector for devices with multiple cameras. |
multiple(array $shots = []) | Enable multiple-shot mode and define the shot sequence. Each shot should have a key and label. |
requireAllShots(bool $required = true) | Require all configured multiple shots before saving. |
enableTextToSpeech(bool $enable = true, string $lang = 'en-US') | Enable or disable text-to-speech instructions for multiple-shot mode. Example: true, 'en-US' |
columnSpanFull() | Make the field span the full width of the form layout. |
❗ IMPORTANT NOTICE: For Local development Testing⎘
The browser’s Camera API only works on secure origins (HTTPS). Many browsers treat https://localhost as secure, but plain http:// over an IP (e.g., http://127.0.0.1:8000) is considered insecure and the camera will be blocked. If it isn’t working for you on localhost, switch to HTTPS or use the temporary Chrome test flags below.
Recommended (safer) options⎘
Temporary Chrome workaround (for testing only)⎘
If you must test over plain HTTP on a LAN IP, you can launch Chrome to temporarily treat that origin as secure. Do not use this for normal browsing. Use a separate profile and close all Chrome windows first.
Replace http://127.0.0.1:8000 with your dev server’s URL.
Windows:
"C:\Program Files\Google\Chrome\Application\chrome.exe" --user-data-dir="C:\chrome-dev-test" --unsafely-treat-insecure-origin-as-secure=http://127.0.0.1:8000 --disable-web-securitymacOS:
/Applications/Google\ Chrome.app/Contents/MacOS/Google\ Chrome \ --user-data-dir="/tmp/chrome-dev-test" \ --unsafely-treat-insecure-origin-as-secure=http://127.0.0.1:8000 \ --disable-web-securityLinux:
google-chrome \ --user-data-dir="/tmp/chrome-dev-test" \ --unsafely-treat-insecure-origin-as-secure=http://127.0.0.1:8000 \ --disable-web-securitySecurity notes⎘
- These flags removes important browser protections. Use them only for local testing of your app.
- Always use a separate
--user-data-dirso your main Chrome profile stays safe. - Close all Chrome windows before running the command, and avoid visiting untrusted sites in that session.
Screenshots (Single Mode)⎘
Screenshots (Multiple Mode)⎘
Contributing⎘
Contributions and pull requests for improvements are welcome!
License⎘
MIT

Comments & Reactions
(click to open)